|
How To use the Ink View OCX to display uploaded signatures on the PC
|   |
Problem: How To use the SatForms Ink View OCX to display uploaded signatures on the desktop PC
Solution: There is an ActiveX control included with Satellite Forms that is used to display the ink images captured in your handheld application on your desktop PC. This control is called the Ink View ActiveX Control (OCX), and is designed to display ink contents (such as signatures) captured on either PalmOS or PocketPC handhelds, and uploaded back to the desktop.
The instructions for using this control were omitted from earlier Satellite Forms documentation.
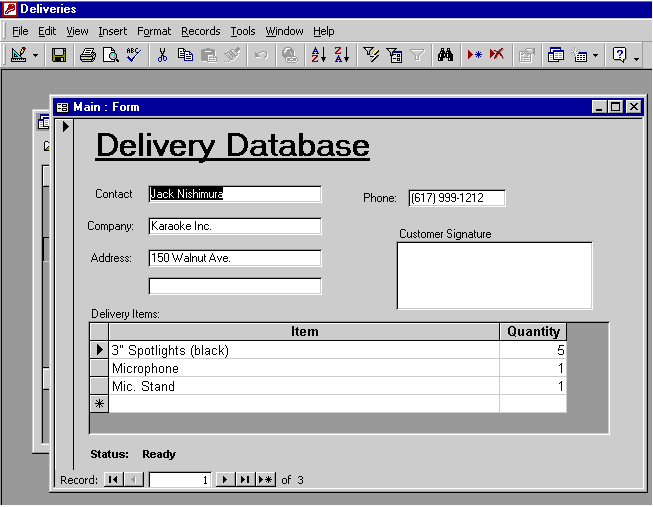
Below is a step-by-step instruction on how to insert and set up the Satellite Forms Ink View ActiveX control. The example used here is using the Access 2000 "Deliveries" sample found in the Satellite Forms directory under "Projects\Sample Projects\Deliveries\Access 2000\Access".
Although this example uses Access 2000(R) the steps taken here are applicable to almost any ActiveX form.
Step 1 - Open the desired form in the "Design" mode and decide where the Ink View control should be located.
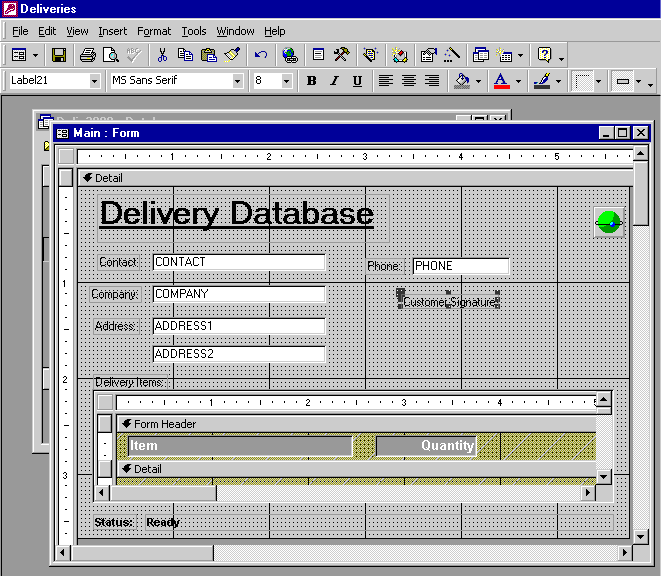
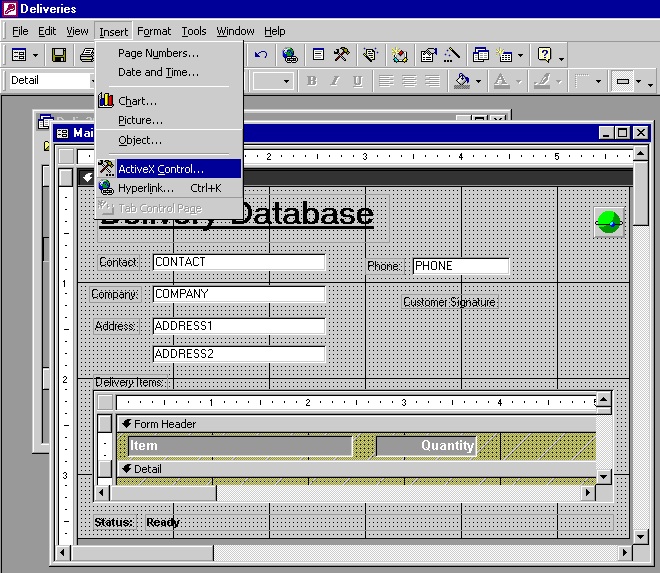
Step 2 - Go to "Insert" and select "ActiveX Control".
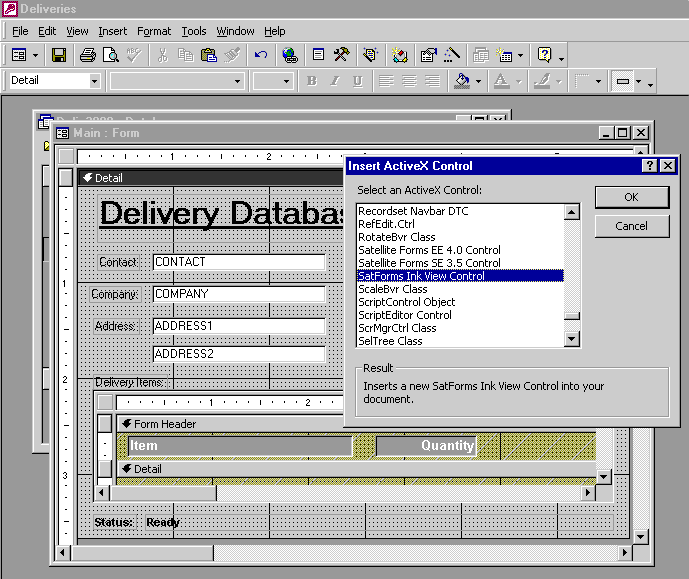
Step 3 - Select "SatForms Ink View Control" in the "Insert ActiveX Control" dialog box.
Step 4 - The Ink View Control will now appear as a white box on the form. The entered ink control data will be displayed in this box exactly as it appears while in the Satellite Forms Ink Control. Move this box to the appropriate space designated by the title bar.
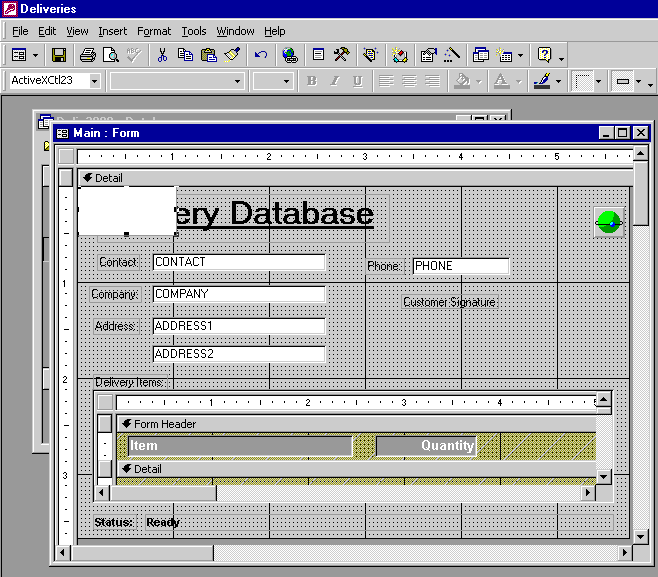
Step 5 - Resize the control to the desired width and height. Then right-click on the control and select "Properties".
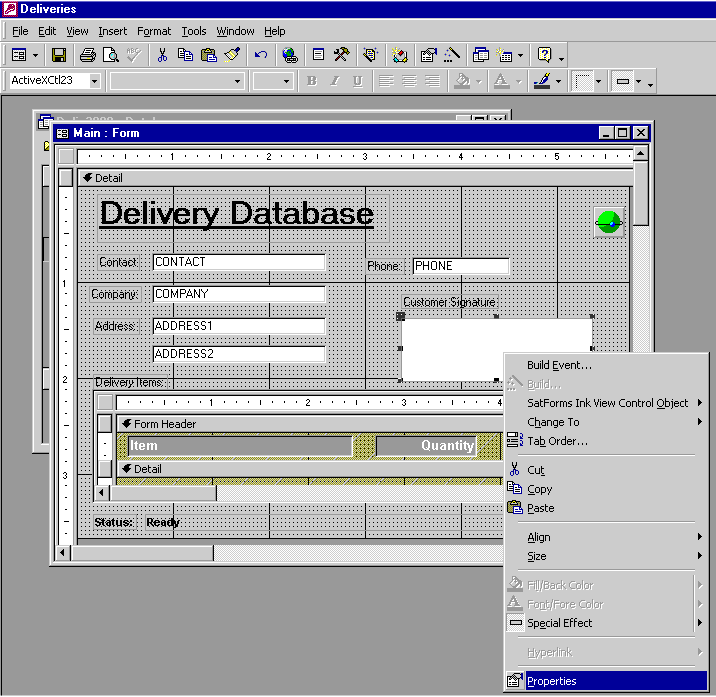
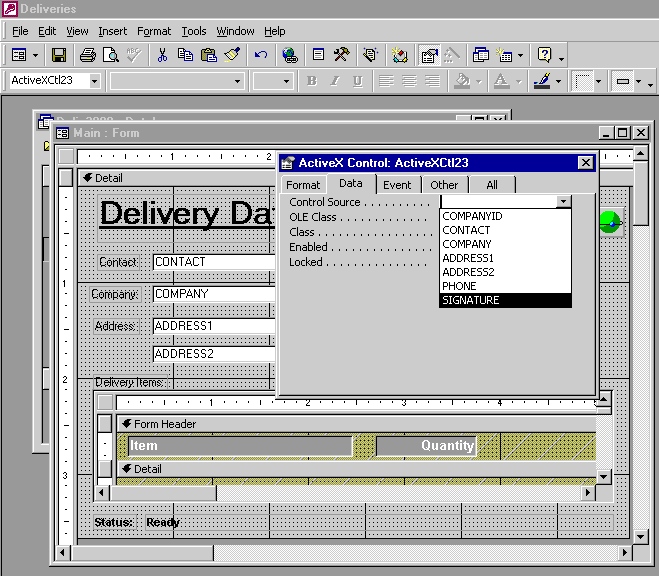
Step 6 - Once the "Properties" window is up select the "Data" tab. Clicking on "Control Source....." will bring up a list of columns in the table linked to this form. Select the column that contains the Ink Control data that needs to be displayed.
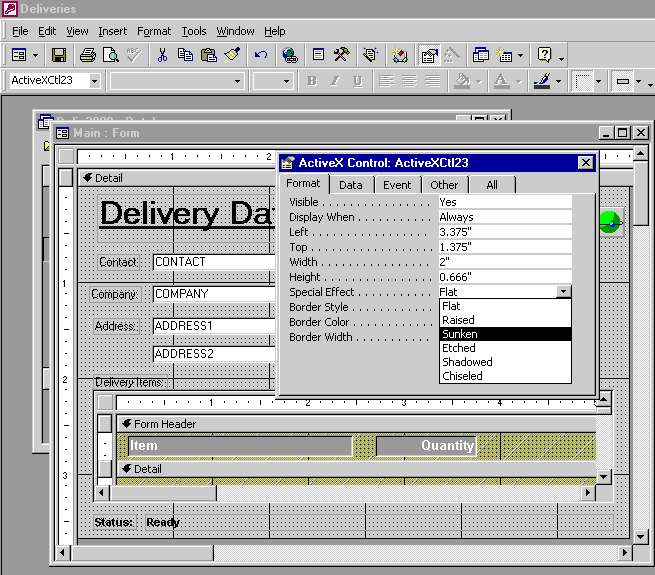
Step 7 - Select any "Special Effects" or border styles under the "Format" tab.
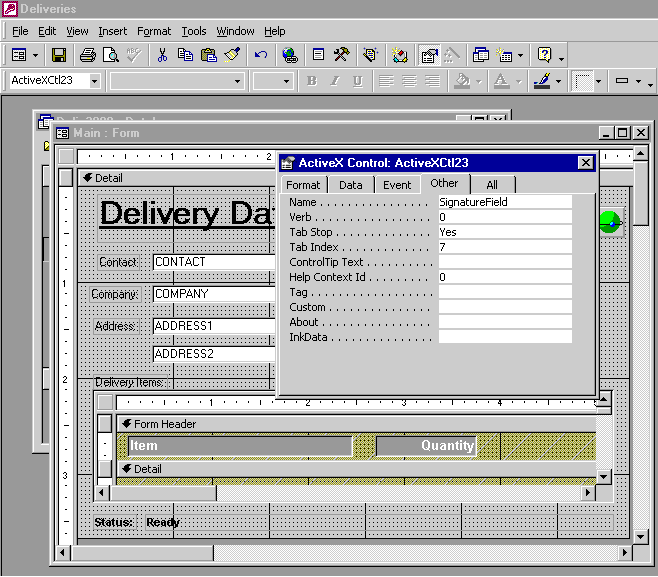
Step 8 - Select the "Other" tab and name this control. The name does not matter so name it anything you want. We'll rename it to SignatureField in this example.
Step 9 - That's it. You're done. View the finished form. Your form is now integrated with the Satellite Forms Ink View control.
Keywords: ink, signature, bitmap, image, display, inkview, activex, ocx
KB ID: 10014
Updated: 2010-06-22
Satellite Forms KnowledgeBase Online