|
How To Create an Installer for your SatForms 7 PocketPC Application
|   |
Problem: How To Create an Installer for your SatForms 7 PocketPC Application
Solution: There are several different approaches to creating an installer for your SatForms PocketPC application. Satellite Forms 7 introduces a new and improved capability to bundle the SatForms runtime engine files directly with your application files for an optimal end user experience. This article presents an approach that generates a single exe file to install your compiled application and bundled Satellite Forms runtime engine to the PocketPC, providing a simple, robust, and professional installation.
Updated for Version 8: With Satellite Forms 8 there is a new capability to use an integrated runtime engine, which removes the need to install the runtime engine SatForms80.exe file separately from the application EXE file.
This example describes all steps needed to create an installer for the PocketPC application "Work Order Sample.exe", based on the SF sample project "Work Order". Directories and program names can be modified to suit your own application by changing the references in the files described below. The process described herein will enable you to create a single-EXE installer file for your SatForms 7 PocketPC application. This approach requires that the PocketPC application uses the PDB device database format, and not CDB database files. The single installer created by this process is compatible with PPC 2002, 2003, 2003SE, and Windows Mobile 5 devices.
The overall approach is to create a PocketPC CAB file for your application with the bundled SatForms runtime engine, and then convert that CAB file into a single EXE installer.
NOTE: Do not let the length of this article dissuade you from using this installer creation process. This article is quite long and liberally illustrated so as to ensure no steps are left out, but you will find it is a straightforward process to create you own app installers using this method, and the professional looking results are worth the investment of your time.
This installer creation method utilizes a freeware PocketPC installer creation tool called Pocket PC Installation Creator, from Aperitto Software. There are many other installer creation tools that could be used including free tools such as NSIS, Inno Setup, PocketSetupCreator, and EzSetup, as well as numerous commercial tools such as InstallShield, Wise Installer, e-PocketSetup, and PocketPC Installer. Pocket PC Installation Creator handles the difficult task of correctly creating a CAB file, with no manual editing of INI files, batch files, or anything like that. It presents an easy wizard interface to enter all of the required information, and then generates the CAB and EXE files for you!
A. What does the installer do?
It implements a complete install program for the your PocketPC application. The install program "WorkOrder_Setup.exe" in this example does the following (note that the PPC must be connected to the desktop and ActiveSync must be running):
1. Displays a readme notice and then license agreement (EULA) which the user must accept to proceed (you supply the text).
2. Installs the application "Work Order Sample.exe", the bundled SF7 runtime engine files and all *.PDB files into the "\Program Files\Work Order" folder on the PPC.
3. Creates a shortcut for the program in "\Windows\Start Menu\Programs" on the PPC.
4. Registers the program and creates an "Unload" file on the PPC for future deletion of the application.
B. Files required to create the installer
1. Pocket PC Installation Creator, from Aperitto Software
This freeware tool from Aperitto Software is available in our Support Files section at http://www.satelliteforms.net/support/ppc_installation_creator_setup.exe (the original author's URL is no longer valid).
Install the Pocket PC Installation Creator tool and accept all of the default install options.
2. Application files: Work Order Sample.exe (icon/executable for PPC), Work Order Sample.pda, all *.PDB files in the AppPkg folder (ESMS20000_WRKLOOKUP.PDB, ESMS20000_WRKSITES.PDB, ESMS20000_WRKWORKITEMS.PDB), and the SatForms70.exe and DvSddi_PPCPDB.dll runtime engine files. Create the PDA, EXE, and PDB files by compiling the PocketPC PDB target of the Work Order sample project included with Satellite Forms 7. Copy the SatForms70.exe and DvSddi_PPCPDB.dll files from the \Satellite Form 7\Runtime\PocketPC folder to the location where the other application files are stored (in this example, they are all copied to a
C:\My Documents\WorkOrderInstall\PocketPC PDB folder.
3. Readme and EULA text files:
setup_readme.txt, eula.txt
Create these two text files as needed for your application. In our example, the setup_readme.txt file contains this text:
The SampleCo Work order application will be installed to your Windows Mobile/PocketPC PDA. After the installation has completed, you can run the Work Order application by tapping on Start | Programs | Work Order.
The sample EULA.txt file contains this text:
End user License Agreement
Insert lawyer-approved text here...
Copyright (C) 2006 SampleCo Corporation
C. Step By Step Process
C.1 Start the PocketPC Installation Creator application. It will open to a blank screen that says "No project is loaded. Please open or create a new one.". Click on the new project icon in the toolbar (the white paper icon). Enter the name of your installer project, for this example enter WorkOrder and click on Save.
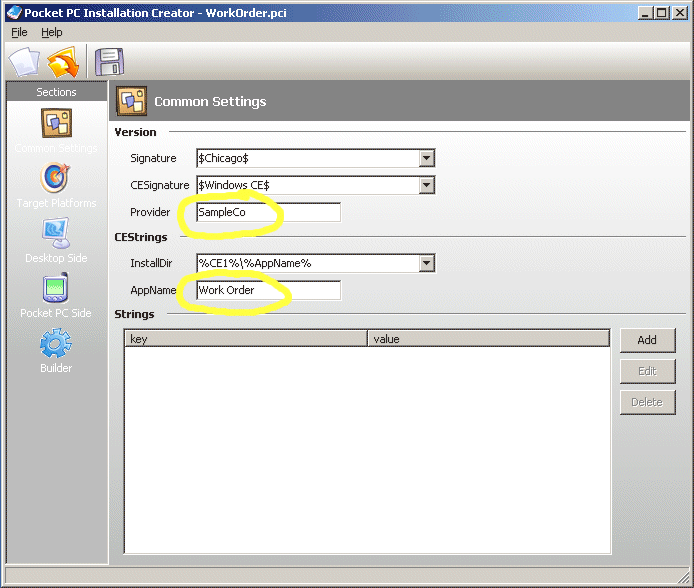
C.2. The Common Settings form is displayed. In the Provider field, enter your company name (in this example we are using SampleCo). In the AppName field enter your application name (in this example we are using Work Order). Leave the other fields unchanged. Click on the Target Platforms icon to go to that form.
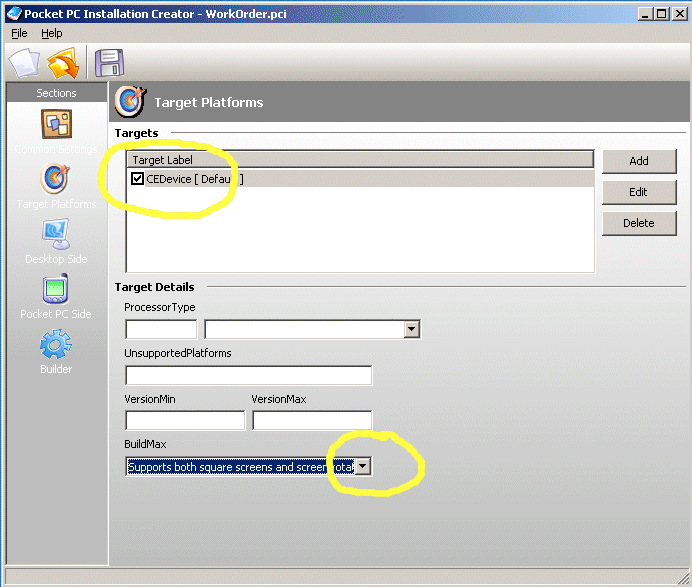
C.3. The Target Platforms form is displayed. Check the box next to CEDevice in the Target Label list so it is selected. Click on the BuildMax droplist and select "Supports both square screens and screen rotation". This ensures that you will not receive the "this app may not run on this version of Windows Mobile" warning when the app is installed. Click on the Desktop Side icon to go to that form.
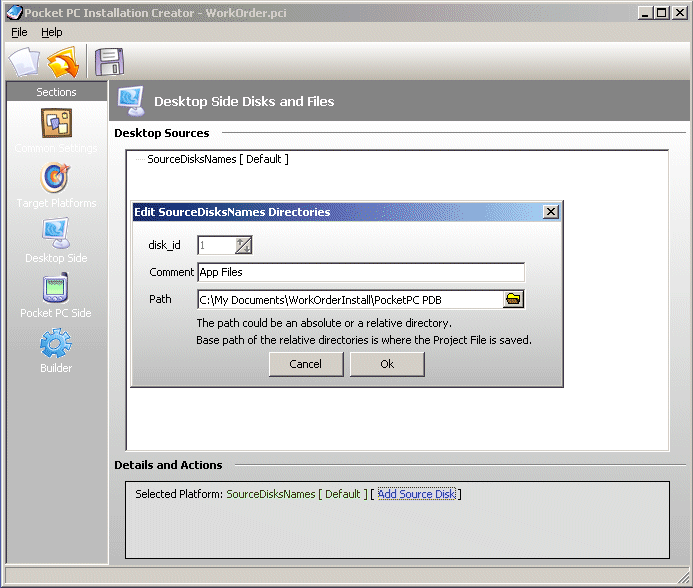
C.4. The Desktop Side Disks and Files form is displayed. This is where we will select all of the files to be installed to the PDA. In the Details and Actions box at the bottom of the form, click on Add Source Disk. The Edit SourceDiskNames dialog is displayed. In the Comment field enter App Files, and then browse to the folder where you have placed all of your PDA files (in this example C:\My Documents\WorkOrderInstall\PocketPC PDB), then click OK.
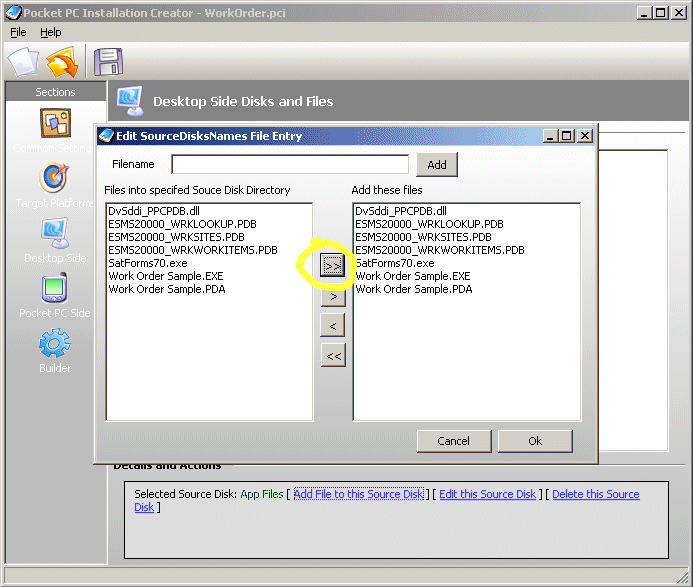
C.5. Now click on the [+] next to SourceDiskNames [Default] which expands to show App Files. Select App Files, then click on Add Files to this Source Disk in the Details and Actions box. The PDA files located in your app files folder should be shown in the list on the left hand side. Click on the >> button to copy all of those files to the list on the right hand side, then click OK. If you click the [+] next to App Files, you should see all of your PDA files listed. Now click on the Pocket PC Side icon to go to that form.
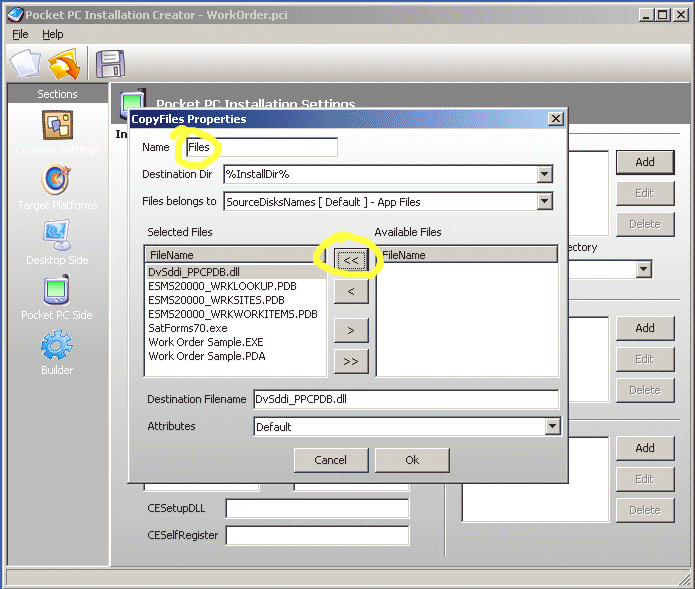
C.6. The Pocket PC Installation Settings form is displayed. In the CopyFiles Sections in the top right corner, click on Add. The CopyFiles Properties dialog is displayed. Enter Files in the Name field, then click on the << button to copy all of your PDA files from the list on the right hand side to the list on the left hand side. Click on OK to close that dialog.
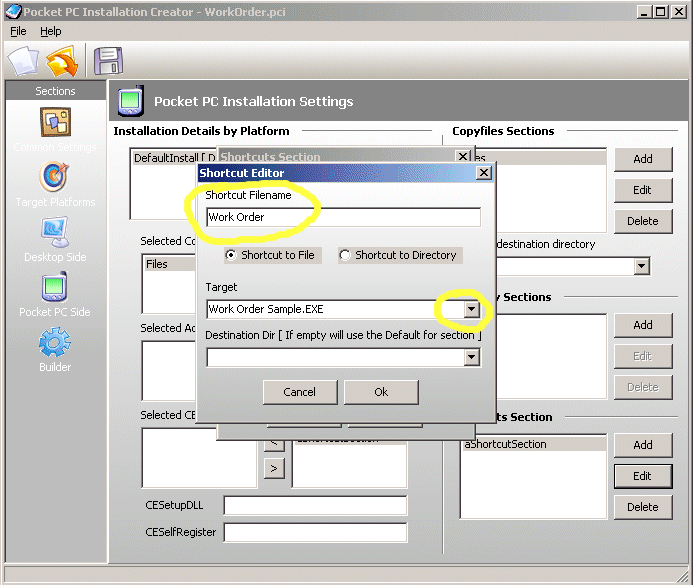
C.7. Now, click on the Add button in the Shortcuts Section in the bottom right of the form, and the ShortCuts Section dialog is displayed. Click on the Add button in the Shortcuts Section dialog, and the Shortcut Editor dialog is displayed. Set the Shortcut Filename to your app name (eg. Work Order). This is the name that your app icon will have in the Programs folder on the PDA when the install is completed. Click the Target droplist, and select your application EXE file from the list (Work Order Sample.exe in this example). Click on OK to close the Shortcut Editor dialog, then click OK to close the Shortcuts Section dialog.
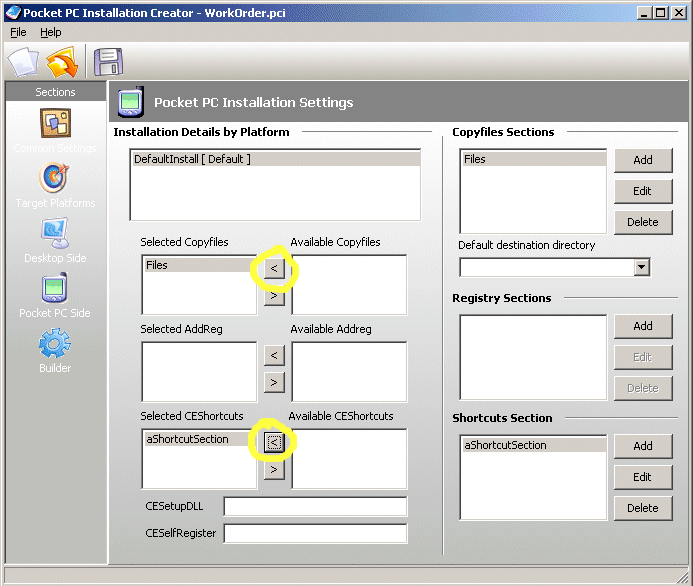
C.8. Next, click on the < button in the Available CopyFiles list to copy Files over to the Selected CopyFiles list. Then click on the < button by the Available CEShortcuts list to copy aShortcutSection over to the Selected CEShortcuts list. You have now completed this form, click on the Builder icon to go to the final Builder form.
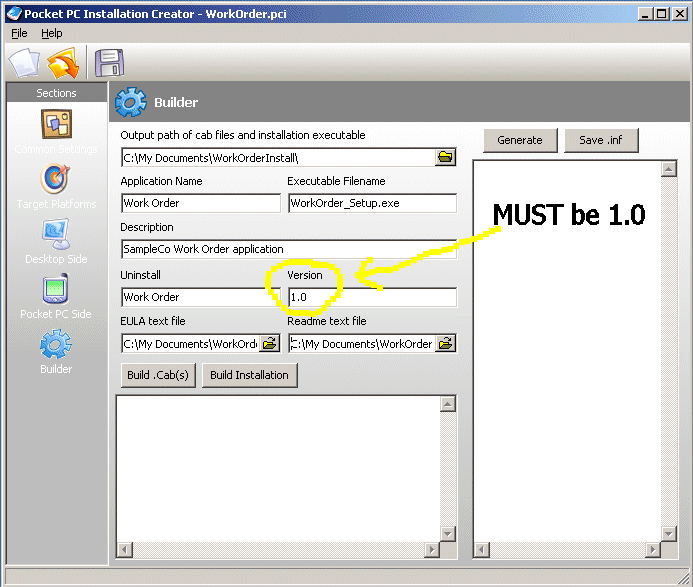
C.9. The Builder form is displayed. Enter your Application Name (Work Order in this example), and enter a filename for your installer executable filename (eg. WorkOrder_Setup.exe). Enter a short Description (eg. SampleCo Work Order application). Enter the same application name in the Uninstall field (eg. Work Order).
IMPORTANT: The Version number field must ALWAYS be set to 1.0. This is the PocketPC CAB format version number, and NOT your application version number. Be sure it is set to 1.0 or the installation will fail!!
Browse to select your EULA text file (eg. EULA.txt) for your app license agreement, and your app readme text file (eg. setup_readme.txt). These will be displayed in the installer when it is run.
Almost finished! Now, let's save the data we have entered before building. Click on the Save disk icon on the toolbar to save your installer creation data file.
C.10. We're ready to build the CAB file. Click on Build .Cab(s) and the CAB file should be generated. You will see 2 warning messages that say "Warning: Section [DefaultInstall] key "AddReg" - there are no section entries to process", but they can be safely ignored. If you see any other error messages, then you will need to correct whatever errors they refer to before proceeding.
If you want to distribute just a CAB file that the user can install directly from the File Explorer on a PocketPC, you are done. However, most developers want to go the additional step of creating an installer that runs on the desktop PC. [Also, if you want to use a different final setup EXE builder tool that works from a CAB file, such as PocketSetupCreator, you can use the CAB you just created for that purpose.]
C.11. Now, the final step: click on Build Installation, and the CAB file will be used to generate your app setup exe file (eg. WorkOrder_Setup.exe). If all goes well, the status window should show the setup exe (eg. WorkOrder_Setup.exe) successfully written, and Build installation ended.
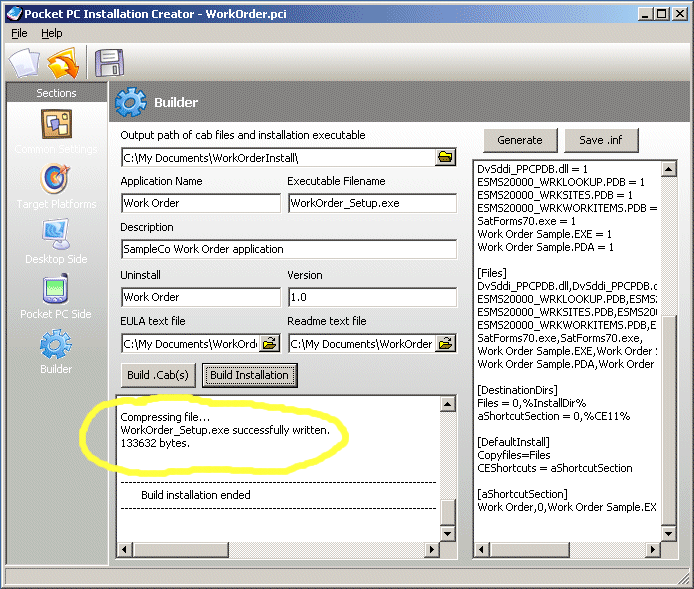
That's it, your installer is completed!
Now, let's test our new app installer. From the Windows Explorer, launch the setup exe (eg. WorkOrder_Setup.exe) that was generated. The initial installer screen is displayed, including the readme file contents.
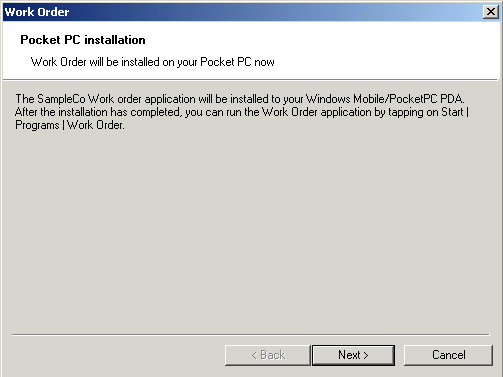
Click Next and the License Agreement screen is shown.
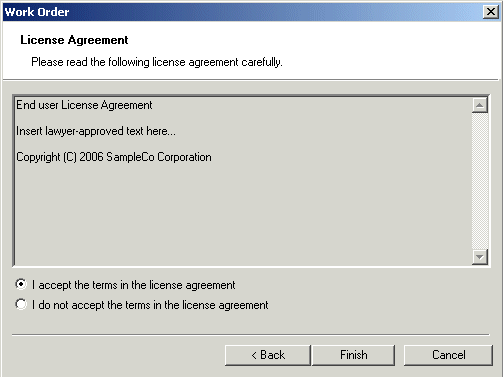
When the user accepts the terms of the license agreement and clicks Finish, the ActiveSync Add/Remove Programs dialog is displayed, and the Installing Applications prompt is shown, giving the user one last chance to cancel the install.

When the user affirms this prompt, the application is then installed to the PocketPC device.
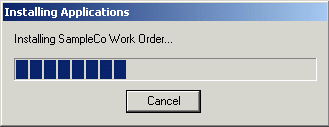
The application can now be launched by tapping on Start | Programs | and then the application shortcut (eg. Work Order).
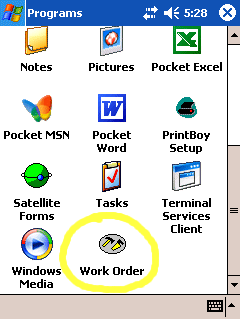
Success!
Keywords: PocketPC, Windows Mobile, install, installer, CAB, CABWiz, setup, installation, deployment, uninstall
KB ID: 10044
Updated: 2010-06-22
Satellite Forms KnowledgeBase Online